Tanuki and Kitsune's Cherry Blossom Night Festival: Difference between revisions
Mikucollemmc (talk | contribs) |
Mikucollemmc (talk | contribs) |
||
| (11 intermediate revisions by 2 users not shown) | |||
| Line 13: | Line 13: | ||
==Event Mechanics== | ==Event Mechanics== | ||
===Event Exchange=== | ===Event Exchange=== | ||
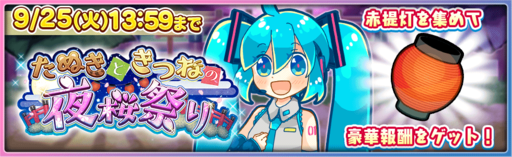
Collect Red Lanterns from enemies and exchange them in the exchange shop. | Collect Red and blue Lanterns from enemies and exchange them in the exchange shop. | ||
===High Score=== | ===High Score=== | ||
'''Second Half stages only'''<br> | '''Second Half stages only'''<br> | ||
| Line 20: | Line 21: | ||
*Defeating more enemies will give you more points. | *Defeating more enemies will give you more points. | ||
Obtain a high score for various event rewards under High Score Ranking. | Obtain a high score for various event rewards under High Score Ranking. | ||
===Everyone's Mission=== | ===Everyone's Mission=== | ||
'''During the second half only'''<br> | '''During the second half only'''<br> | ||
Bosses defeated by all players will be tallied up and rewards will be given out based on the amount defeated. | Bosses defeated by all players will be tallied up and rewards will be given out based on the amount defeated. | ||
===Last Boss Battle First Strike - Neutralization === | |||
'''Super Hard, Expert, and Extreme only''' <br> | |||
All effects from cards will be cancelled by the enemy at the beginning of the Last Boss Battle. | |||
===Corresponded Maps=== | |||
All the difficulties are corresponded with their own original normal quest maps below, but item and enemy settings are different from the original ones: | |||
* Easy - Cape Hoshima 1-4 | |||
* Normal - Watermill Square 2-4 | |||
* Hard - Inari Shrine's Edge 3-1 | |||
* Super Hard - Inari Shrine's Edge 3-4 | |||
* Expert - Tanuki Shrine 4-1 | |||
* Extreme - Tanuki Shrine 4-5 | |||
==Stages and Drop List== | ==Stages and Drop List== | ||
{{EventQuestInfoThird | {{EventQuestInfoThird | ||
| Line 36: | Line 47: | ||
|Drop = Red Lanterns<br>Materials - (Costume up to Lv4) / (Gold/Metal up to SR) | |Drop = Red Lanterns<br>Materials - (Costume up to Lv4) / (Gold/Metal up to SR) | ||
}} | }} | ||
{{ | {{EventQuestInfoFourth | ||
|QuestName = Tanuki and Kitsune's Cherry Blossom Night Festival | |||
|JPQuestName = たぬきときつねの夜桜祭り | |||
|File = Event66_sp_normal.png | |||
|Condition = No revives | |||
|Attribute = {{Attributes|Mercury}}{{Attributes|Jupiter}}{{Attributes|Mars}} | |||
|Character = {{QueChar|lineEveryone}} | |||
|Drop = Blue Lanterns<br>Materials - (Costume up to Lv4) / (Gold/Metal up to SSR) | |||
}} | |||
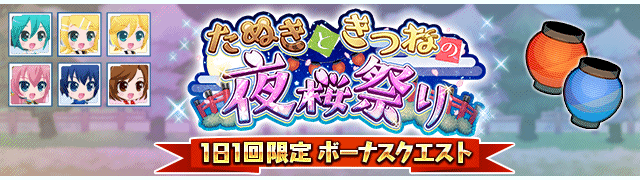
{{EventQuestInfoBonus2 | |||
|QuestName = Tanuki and Kitsune's Cherry Blossom Night Festival Once-a-day Bonus Quest | |QuestName = Tanuki and Kitsune's Cherry Blossom Night Festival Once-a-day Bonus Quest | ||
|JPQuestName = たぬきときつねの夜桜祭り 1日1回限定 ボーナスクエスト | |JPQuestName = たぬきときつねの夜桜祭り 1日1回限定 ボーナスクエスト | ||
|File = | |File = Event66_1day_2.png | ||
|Condition = No revives allowed. | |Condition = No revives allowed. | ||
|Attribute = {{Attributes|Mercury}}{{Attributes|Jupiter}}{{Attributes|Mars}} | |Attribute = {{Attributes|Mercury}}{{Attributes|Jupiter}}{{Attributes|Mars}} | ||
|Character = {{QueChar|lineEveryone}} | |Character = {{QueChar|lineEveryone}} | ||
|Drop = Red Lanterns<br>Materials - (Costume up to Lv4) / (Gold/Metal up to | |Drop = Red Lanterns & Blue Lanterns<br>Materials - (Costume up to Lv4) / (Gold/Metal up to SSR) | ||
}} | }} | ||
| Line 54: | Line 74: | ||
| Lets Tweet! | | Lets Tweet! | ||
| {{ExchangeIcon|MikuCoin}} x1 | | {{ExchangeIcon|MikuCoin}} x1 | ||
|- | |||
!colspan="2" | First Half | |||
|- | |- | ||
!colspan="2" | Easy | !colspan="2" | Easy | ||
| Line 103: | Line 125: | ||
|- | |- | ||
!colspan="2" | Expert | !colspan="2" | Expert | ||
|- | |||
| Clear Expert with No Continues | |||
| {{ExchangeIcon|MikuCoin}} x1 | |||
|- | |||
| Clear Expert 3 times | |||
| {{ExchangeIcon|MikuCoin Fragment}} x2 | |||
|- | |||
| Clear Expert 5 times | |||
| {{ExchangeIcon|MikuCoin Fragment}} x2 | |||
|- | |||
| Clear Expert 10 times | |||
| {{ExchangeIcon|MikuCoin Fragment}} x2 | |||
|- | |||
| Clear Expert 20 times | |||
| {{ExchangeIcon|MikuCoin Fragment}} x2 | |||
|- | |||
| Clear Expert 30 times | |||
| {{ExchangeIcon|MikuCoin Fragment}} x2 | |||
|- | |||
| Clear Expert 39 times | |||
| {{ExchangeIcon|MikuCoin}} x3 | |||
|- | |||
| Clear Expert with No Continues with a 7-card deck | |||
| {{ExchangeIcon|MikuCoin Fragment}} x2 | |||
|- | |||
| Clear Expert with No Continues with a 6-card deck | |||
| {{ExchangeIcon|MikuCoin Fragment}} x2 | |||
|- | |||
| Clear Expert with No Continues with a 5-card deck | |||
| {{ExchangeIcon|MikuCoin}} x3 | |||
|- | |||
!colspan="2" | Second Half | |||
|- | |||
!colspan="2" | Easy | |||
|- | |||
| Clear Easy with No Continues | |||
| {{Metal|SSR+}} x1 | |||
|- | |||
| Clear Easy 3 times | |||
| {{Metal|SSR+}} x1 | |||
|- | |||
| Clear Easy 5 times | |||
| {{Metal|SSR+}} x1 | |||
|- | |||
!colspan="2" | Normal | |||
|- | |||
| Clear Normal with No Continues | |||
| {{Metal|SSR+}} x1 | |||
|- | |||
| Clear Normal 3 times | |||
| {{Metal|SSR+}} x1 | |||
|- | |||
| Clear Normal 5 times | |||
| {{Metal|SSR+}} x1 | |||
|- | |||
!colspan="2" | Hard | |||
|- | |||
| Clear Hard with No Continues | |||
| {{ExchangeIcon|MikuCoin Fragment}} x2 | |||
|- | |||
| Clear Hard 3 times | |||
| {{ExchangeIcon|MikuCoin Fragment}} x2 | |||
|- | |||
| Clear Hard 5 times | |||
| {{ExchangeIcon|MikuCoin Fragment}} x2 | |||
|- | |||
!colspan="2" | Super Hard | |||
|- | |- | ||
| Clear Super Hard with No Continues | | Clear Super Hard with No Continues | ||
| {{ExchangeIcon|MikuCoin}} x1 | | {{ExchangeIcon|MikuCoin Fragment}} x1 | ||
|- | |- | ||
| Clear Super Hard 3 times | | Clear Super Hard 3 times | ||
| {{Angel|SR}} x1 | |||
|- | |||
| Clear Super Hard 5 times | |||
| {{ExchangeIcon|MikuCoin Fragment}} x2 | | {{ExchangeIcon|MikuCoin Fragment}} x2 | ||
|- | |- | ||
| Clear | !colspan="2" | Expert | ||
|- | |||
| Clear Expert with No Continues | |||
| {{ExchangeIcon|MikuCoin Fragment}} x2 | | {{ExchangeIcon|MikuCoin Fragment}} x2 | ||
|- | |- | ||
| Clear | | Clear Expert 3 times | ||
| {{ExchangeIcon|MikuCoin Fragment}} x2 | | {{ExchangeIcon|MikuCoin Fragment}} x2 | ||
|- | |- | ||
| Clear | | Clear Expert 5 times | ||
| {{ExchangeIcon|MikuCoin Fragment}} x2 | | {{ExchangeIcon|MikuCoin Fragment}} x2 | ||
|- | |- | ||
| Clear | | Clear Expert 10 times | ||
| {{ExchangeIcon|MikuCoin Fragment}} x2 | | {{ExchangeIcon|MikuCoin Fragment}} x2 | ||
|- | |- | ||
| Clear | | Clear Expert 20 times | ||
| {{ExchangeIcon|MikuCoin}} | | {{ExchangeIcon|MikuCoin Fragment}} x2 | ||
|- | |- | ||
| Clear | | Clear Expert 30 times | ||
| {{ExchangeIcon|MikuCoin Fragment}} x2 | | {{ExchangeIcon|MikuCoin Fragment}} x2 | ||
|- | |- | ||
| Clear | | Clear Expert 40 times | ||
| {{ExchangeIcon|MikuCoin Fragment}} x2 | | {{ExchangeIcon|MikuCoin Fragment}} x2 | ||
|- | |- | ||
| Clear | | Clear Expert 45 times | ||
| {{ExchangeIcon|MikuCoin}} x1 | |||
|- | |||
| Clear Expert 50 times | |||
| {{Angel|SSR}} x1 | |||
|- | |||
| Clear Expert 60 times | |||
| {{ExchangeIcon|MikuCoin}} x1 | |||
|- | |||
| Clear Expert 70 times | |||
| {{ExchangeIcon|MikuCoin}} x1 | |||
|- | |||
| Clear Expert 80 times | |||
| {{ExchangeIcon|MikuCoin}} x1 | |||
|- | |||
| Clear Expert 90 times | |||
| {{ExchangeIcon|MikuCoin}} x1 | |||
|- | |||
| Clear Expert 100 times | |||
| {{ExchangeIcon|MikuCoin}} x5 | |||
|- | |||
| Clear Expert with No Continues with a 7-card deck | |||
| {{ExchangeIcon|MikuCoin}} x3 | | {{ExchangeIcon|MikuCoin}} x3 | ||
|- | |||
| Clear Expert with No Continues with a 5-card deck | |||
| {{ExchangeIcon|MikuCoin}} x1 | |||
|- | |||
| Clear Expert with No Continues with a 3-card deck | |||
| {{Angel|SSR}} x1 | |||
|- | |||
| Clear Expert with a score greater than 800,000 | |||
| {{ExchangeIcon|MikuCoin}} x2 | |||
|- | |||
| Clear Expert with a score greater than 1,200,000 | |||
| {{ExchangeIcon|MikuCoin}} x2 | |||
|- | |||
| Clear Expert with a score greater than 1,600,000 | |||
| {{ExchangeIcon|MikuCoin}} x2 | |||
|- | |||
| Clear Expert with a score greater than 2,000,000 | |||
| {{ExchangeIcon|MikuCoin}} x2 | |||
|- | |||
| Clear Expert with a score greater than 2,500,000 | |||
| {{ExchangeIcon|MikuCoin}} x2 | |||
|- | |||
| Clear Expert with a score greater than 3,000,000 | |||
| {{Angel|SSR+}} x1 | |||
|- | |||
!colspan="2" | Extreme | |||
|- | |||
| Clear Extreme with No Continues | |||
| {{ExchangeIcon|MikuCoin}} x10 | |||
|} | |} | ||
<!-- | <!-- | ||
| Line 244: | Line 388: | ||
==Event Exchange Shop== | ==Event Exchange Shop== | ||
Exchange | Exchange Lanterns for items. You can double check the amount of event items you have by tapping on the Items ([[File:Hp_item.png|25px|link=]]) on the home screen and selecting the Event (middle) tab. yarn can be used on both the First Half and Second Half exchange banners but the second set of items won't be available until the second half of the event.<br> | ||
<tabs plain> | |||
<tab name="Red Lantern"> | |||
{| class="wikitable" | {| class="wikitable" | ||
! Item | ! Item | ||
| Line 311: | Line 457: | ||
|- | |- | ||
|} | |} | ||
</tab> | |||
<tab name="Blue Lantern"> | |||
{| class="wikitable" | |||
! Item | |||
! Amount | |||
! Limit | |||
|- | |||
!colspan="3" | Event Limited Items | |||
|- | |||
|[[File:7070093.png|54px|link=Corundum Pure Love]] | |||
|1800 | |||
|5 | |||
|- | |||
|[[File:coid_397.jpg|54px|link=Hyakka Ryouran (Miku)]][[File:coid_398.jpg|54px|link=Hyakka Ryouran (Rin)]][[File:coid_399.jpg|54px|link=Yuusou Karei (Len)]]<br>[[File:coid_400.jpg|54px|link=Hyakka Ryouran (Luka)]][[File:coid_401.jpg|54px|link=Yuusou Karei (KAITO)]][[File:coid_402.jpg|54px|link=Hyakka Ryouran (MEIKO)]] | |||
|250 | |||
|5 | |||
|- | |||
|[[File:coid_395.jpg|54px|link=Hyakka Ryouran (Girls)]] | |||
|250 | |||
|48 | |||
|- | |||
|[[File:coid_396.jpg|54px|link=Yuusou Karei (Boys)]] | |||
|250 | |||
|24 | |||
|- | |||
|[[File:coid_403.jpg|54px|link=Twinkly Water Balloon]][[File:coid_404.jpg|54px|link=Fireworks Festival Fan]][[File:coid_405.jpg|54px|link=Shooting Star Banana]] | |||
|500 | |||
|11 | |||
|- | |||
!colspan="3" | Materials | |||
|- | |||
|{{Angel|SR+}} | |||
|800 | |||
|1 | |||
|- | |||
|{{Angel|SSR}} | |||
|1200 | |||
|1 | |||
|- | |||
|{{Metal|SSR}} | |||
|150 | |||
|30 | |||
|- | |||
!colspan="3" | Scores | |||
|- | |||
|{{Scores|Singing}} | |||
|400 | |||
|5 | |||
|- | |||
|{{Scores|Defense}} | |||
|400 | |||
|5 | |||
|- | |||
|{{Scores|Life}} | |||
|400 | |||
|5 | |||
|- | |||
!colspan="3" | Other | |||
|- | |||
|{{ExchangeIcon|Angel}} | |||
|200 | |||
|8 | |||
|- | |||
|{{ExchangeIcon|Gacha}} | |||
|300 | |||
|4 | |||
|- | |||
|GP x10 | |||
|1 | |||
|None | |||
|- | |||
|} | |||
</tab> | |||
</tabs> | |||
*Gacha Tickets expire seven days after purchase. | *Gacha Tickets expire seven days after purchase. | ||
| Line 439: | Line 659: | ||
|- | |- | ||
|SR+ | |SR+ | ||
|[[File:1060096.png|54px|link=Enjoying the Cool of the Evening Festival Miku]][[File:2060035.png|54px|link=Tidings | |[[File:1060096.png|54px|link=Enjoying the Cool of the Evening Festival Miku]][[File:2060035.png|54px|link=Floral Tidings Rin]][[File:4060035.png|54px|link=Floral Tidings Luka]][[File:5060027.png|54px|link=Floral Tidings KAITO]] | ||
|- | |- | ||
|SR | |SR | ||
|[[File:1050094.png|54px|link=Tidings | |[[File:1050094.png|54px|link=Floral Tidings Miku]][[File:3050046.png|54px|link=Floral Tidings Len]][[File:6050039.png|54px|link=Floral Tidings MEIKO]] | ||
|} | |} | ||
'''Gacha Precautions''' | '''Gacha Precautions''' | ||
Latest revision as of 21:11, 19 June 2020
|
| Dramatic Walk Music: koyori / Lyrics: koyori Dramatic Walk 作曲: 電ポルP (koyori) / 作詞 電ポルP (koyori) |
Area Character(s):      
|
Event Mechanics
Event Exchange
Collect Red and blue Lanterns from enemies and exchange them in the exchange shop.
High Score
Second Half stages only
Throughout the second half of stages, defeating enemies will add onto your score. Your final score is displayed when you've completed the quest along with your current high score below it.
- The higher your deck's Singing Power, the more points you're able to obtain.
- Defeating more enemies will give you more points.
Obtain a high score for various event rewards under High Score Ranking.
Everyone's Mission
During the second half only
Bosses defeated by all players will be tallied up and rewards will be given out based on the amount defeated.
Last Boss Battle First Strike - Neutralization
Super Hard, Expert, and Extreme only
All effects from cards will be cancelled by the enemy at the beginning of the Last Boss Battle.
Corresponded Maps
All the difficulties are corresponded with their own original normal quest maps below, but item and enemy settings are different from the original ones:
- Easy - Cape Hoshima 1-4
- Normal - Watermill Square 2-4
- Hard - Inari Shrine's Edge 3-1
- Super Hard - Inari Shrine's Edge 3-4
- Expert - Tanuki Shrine 4-1
- Extreme - Tanuki Shrine 4-5
Stages and Drop List
| ||||||||||||||||||||||||||||||
| ||||||||||||||||||||||||||||||


| ||||||||||||||||||||||||||||||||||||||||||||||||
| ||||||||||||||||||||||||||||||||||||||||||||||||

| |||||||||||||||||||||||||||||
| |||||||||||||||||||||||||||||
Missions
Quest Missions
| Mission | Reward |
|---|---|
| Lets Tweet! | |
| First Half | |
| Easy | |
| Clear Easy with No Continues |  x1 x1
|
| Clear Easy 3 times | x1
|
| Clear Easy 5 times | x1
|
| Normal | |
| Clear Normal with No Continues | x1
|
| Clear Normal 3 times | |
| Clear Normal 5 times | |
| Hard | |
| Clear Hard with No Continues | |
| Clear Hard 3 times | |
| Clear Hard 5 times | |
| Super Hard | |
| Clear Super Hard with No Continues | |
| Clear Super Hard 3 times | |
| Clear Super Hard 5 times | |
| Clear Super Hard with No Continues with a 5-card deck | |
| Expert | |
| Clear Expert with No Continues | |
| Clear Expert 3 times | |
| Clear Expert 5 times | |
| Clear Expert 10 times | |
| Clear Expert 20 times | |
| Clear Expert 30 times | |
| Clear Expert 39 times | |
| Clear Expert with No Continues with a 7-card deck | |
| Clear Expert with No Continues with a 6-card deck | |
| Clear Expert with No Continues with a 5-card deck | |
| Second Half | |
| Easy | |
| Clear Easy with No Continues | x1
|
| Clear Easy 3 times | x1
|
| Clear Easy 5 times | x1
|
| Normal | |
| Clear Normal with No Continues | x1
|
| Clear Normal 3 times | x1
|
| Clear Normal 5 times | x1
|
| Hard | |
| Clear Hard with No Continues | |
| Clear Hard 3 times | |
| Clear Hard 5 times | |
| Super Hard | |
| Clear Super Hard with No Continues | |
| Clear Super Hard 3 times |  x1 x1
|
| Clear Super Hard 5 times | |
| Expert | |
| Clear Expert with No Continues | |
| Clear Expert 3 times | |
| Clear Expert 5 times | |
| Clear Expert 10 times | |
| Clear Expert 20 times | |
| Clear Expert 30 times | |
| Clear Expert 40 times | |
| Clear Expert 45 times | |
| Clear Expert 50 times |  x1 x1
|
| Clear Expert 60 times | |
| Clear Expert 70 times | |
| Clear Expert 80 times | |
| Clear Expert 90 times | |
| Clear Expert 100 times | |
| Clear Expert with No Continues with a 7-card deck | |
| Clear Expert with No Continues with a 5-card deck | |
| Clear Expert with No Continues with a 3-card deck | x1
|
| Clear Expert with a score greater than 800,000 | |
| Clear Expert with a score greater than 1,200,000 | |
| Clear Expert with a score greater than 1,600,000 | |
| Clear Expert with a score greater than 2,000,000 | |
| Clear Expert with a score greater than 2,500,000 | |
| Clear Expert with a score greater than 3,000,000 |  x1 x1
|
| Extreme | |
| Clear Extreme with No Continues | |
Notes/Precautions
- Tweet mission is done in-app by pressing the button next to the mission and tapping Tweet (ツイートする).
- "No Continues" means not reviving during a quest. This does not count suspending a quest.
- Friend cards are omitted in deck-only related mission conditions
- "Clear (difficulty) x times" missions require you to clear the previous mission before the next one is unlocked.
- The count will reset back at 0 once the mission is cleared. This does not apply to other missions such as Event Pt missions.
Event Exchange Shop
Exchange Lanterns for items. You can double check the amount of event items you have by tapping on the Items (![]() ) on the home screen and selecting the Event (middle) tab. yarn can be used on both the First Half and Second Half exchange banners but the second set of items won't be available until the second half of the event.
) on the home screen and selecting the Event (middle) tab. yarn can be used on both the First Half and Second Half exchange banners but the second set of items won't be available until the second half of the event.
| Item | Amount | Limit |
|---|---|---|
| Event Limited Items | ||

|
1800 | 5 |
     
|
500 | 2 |

|
1200 | 8 |

|
1200 | 4 |
| Materials | ||
|
|
500 | 1 |
|
|
1200 | 1 |

|
150 | 30 |
| Scores | ||
| 400 | 5 | |
| 400 | 5 | |
| 400 | 5 | |
| Other | ||
| 200 | 8 | |
| 300 | 4 | |
| GP x10 | 1 | None |
| Item | Amount | Limit |
|---|---|---|
| Event Limited Items | ||

|
1800 | 5 |
     
|
250 | 5 |

|
250 | 48 |

|
250 | 24 |
  
|
500 | 11 |
| Materials | ||

|
800 | 1 |
|
|
1200 | 1 |
|
|
150 | 30 |
| Scores | ||
| 400 | 5 | |
| 400 | 5 | |
| 400 | 5 | |
| Other | ||
| 200 | 8 | |
| 300 | 4 | |
| GP x10 | 1 | None |
- Gacha Tickets expire seven days after purchase.
Event Rankings Rewards
| 1~10 | 11~39 | 40~100 | 101~390 | 391~1000 | 1001~2000 | 2001~3000 | 3001~1000 | |
|---|---|---|---|---|---|---|---|---|

|
x5 | x3 | x1 | - | - | - | - | - |
| x3000 | x1800 | x1200 | x600 | x180 | x60 | - | - | |
| x6 | x6 | x6 | x6 | x3 | x2 | x2 | x1 | |
|
|
x6 | x6 | x6 | x6 | x3 | x2 | x2 | x1 |
| x10 | x10 | x10 | x10 | x10 | x10 | x5 | x5 | |
| x10 | x10 | x10 | x10 | x10 | x10 | x5 | x5 | |
| x10 | x10 | x10 | x10 | x10 | x10 | x5 | x5 |
Everyone's Mission
Work together with everyone during the second half of the event by defeating bosses. All bosses defeated will be tallied up and rewards will be given out based on the total number of bosses across all players.
| No. Defeated | Reward |
|---|---|
| 15,000 | x1
|
| 30,000 | |
| 45,000 | x1
|
| 60,000 | |
| 75,000 | x1
|
| 90,000 | |
| 105,000 | x1
|
| 120,000 | |
| 135,000 |  x2 x2
|
| 150,000 | x3
|
- You must have defeated at least one boss during the second half of the event in order to be eligible for rewards.
Support Cards & Support Gacha
Event Boosts
The following cards will gain an increase to all stats and decreases the skill points required when taken into the event quest. These cards will also be marked with a star (★) in the front of the card's name and will display an orange boost arrow (![]() ). These cards will also gain an increase in points (
). These cards will also gain an increase in points (![]() ) as well.
) as well.
| Rarity | Increased Singing Power | Skill Point Requirements |
|---|---|---|
| SR | 100% | 50% Off |
| SR+ | ||
| SSR | 200% | |
| SSR | 300% |
Support Gachas
| Autumn Festival gacha | ||
|---|---|---|
| (All listed period are GMT+9 Japanese Time) | ||

|

|

|
| 9/11 17:40~9/15 13:59 | 8/15 14:00~9/19 13:59 | 9/19 14:00~9/25 13:59 |
One-time Only Special 10+1
At the cost of 100 MikuCoins, you will only pull cards SR or greater with the eleventh card guaranteed to be SSR or greater. This gacha uses the following rates. This gacha can only be drawn once per player per gacha part.
SSR+ :  6.00%
SSR  : 15.00%
SR+  : 34.00%
SR   : 45.00%
A special version of the gacha will be available towards the last couple days of the event with the following changes
- An event limited SSR+ is guaranteed instead of an SSR
- All SSR+ cards featured in this gacha are event limited SSR+ cards.
- Cards from all three parts are available
- All cards SSR or lower rarity may be cards not featured in this gacha.
Support Cards
| Rarity | Card |
|---|---|
| SSR+ |       
|
| SSR |   
|
| SR+ |    
|
| SR |   
|
Gacha Precautions
- All cards in these gachas will not appear in Premium Gacha.
- These cards may reappear in the future without prior notice.
- Appearance rates are rounded to the third decimal place, so rates may not add up to 100%